
Miniature Hand Planes
Precision planes scaled down for smoothing tiny surfaces. Essential for achieving flat, clean faces on miniature panels and tabletops.

Where raw hardwood becomes miniature art

Each piece follows a meticulous eight-step process. The photographs below are finished 1/12 scale works from this studio, shown to illustrate each stage — not pictures of the bench mid-build.
Every piece begins with studying the original period furniture. Historical references, museum archives, and antique photographs inform scaled drawings that capture every proportion and detail.
Example of a finished period reproduction. No photograph of the drawing board is shown.
Scaling Down Plans
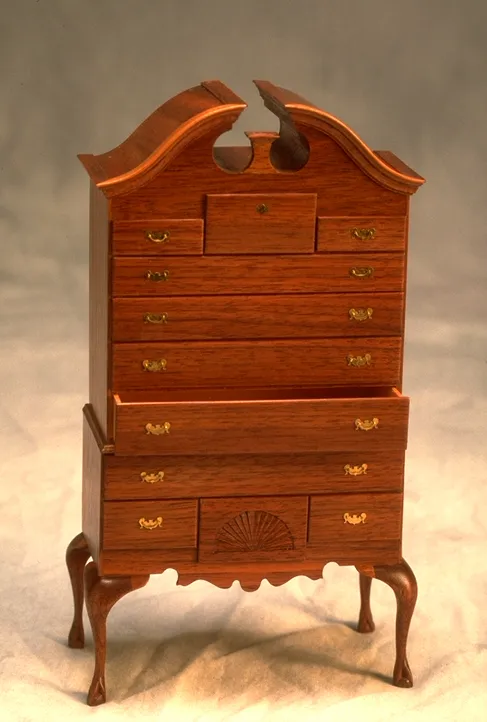
Choosing the right hardwood is critical. Each species is selected for its grain pattern, workability at miniature scale, and historical accuracy to the period being reproduced.
Black walnut highboy — an example of species chosen for grain and period accuracy.
Choosing Wood Guide
Raw stock is cut to 1/12 scale dimensions with extreme precision. At this scale, tolerances are measured in fractions of a millimeter. There is no room for error.
Tapered pencil posts on a finished Shaker bed — the result of precise milling at 1/12 scale.
Essential Tools
Hand-cutting dovetails, mortise and tenon joints at miniature scale. These are the same joints used in full-size period furniture, shrunk down to tiny dimensions.
Hand-cut miniature spline joinery, shown as an example of 1/12 scale work.
Miniature Joints Guide
Adding shell carvings, fluting, and decorative elements by hand using micro chisels and gouges. This is where each piece truly comes alive with character.
Hand-carved Hepplewhite shield back — an example of decorative work at 1/12 scale.

Carefully fitting all components together. Every joint must be tight and true. Miniature clamps hold pieces in place while the glue sets over hours.
A fully assembled continuous-arm chair — every joint fitted by hand.
Beginner Guide
Applying French polish or lacquer for museum-quality protection. Multiple coats are hand-rubbed to build depth and warmth, giving each piece its final glow.
Oil-finished Brazilian rosewood rocker — an example of a completed museum-quality surface.
Finishing Techniques
Documenting the finished piece with detailed photography, then carefully packing in custom-fitted foam for safe shipping anywhere in the world.
Studio photograph of a finished dining set, ready for collectors.
Display & Protection Guide
Specialized instruments that make museum-quality miniature woodworking possible. Many are custom-made or modified for working at 1/12 scale. The photographs below are illustrative of the tool types — they are not photographs of this workshop.
Precision planes scaled down for smoothing tiny surfaces. Essential for achieving flat, clean faces on miniature panels and tabletops.

Ultra-fine chisels for cutting joints and carving decorative details like shell motifs and fluting at 1/12 scale.

Fine-tooth saws that allow intricate cuts in tiny workpieces. Indispensable for cutting delicate curves and scroll work.

Specialized clamps designed for holding tiny components during glue-ups. Precise pressure without crushing delicate parts.

A small lathe for turning miniature spindles, posts, finials, and other round components with perfect symmetry.

High-quality magnifying lenses and headsets that make it possible to see and work at the extreme precision this scale demands.
Master the craft with these in-depth technique guides.
Everything you need to know to start your journey in miniature woodworking, from tools to techniques.
Read ArticleA comprehensive guide to the specialized tools every miniature furniture maker needs in their workshop.
Read ArticleUnderstanding grain scale, workability, and historical accuracy when selecting wood species for miniature work.
Read ArticleMaster the art of cutting dovetails, mortise and tenon, and other joints at 1/12 scale.
Read ArticleFrom French polish to oil finishes, learn how to achieve museum-quality surfaces on tiny pieces.
Read ArticleHow to organize and equip a dedicated workspace for miniature furniture making.
Read ArticleMuseum-exhibited craftsmanship, available to collectors worldwide. Whether you're starting a new collection or adding to an existing one, each piece is built to become a treasured heirloom. Let's discuss your vision.