
Miniature Woodworking Joints: Dovetails & Mortise and Tenon
Master miniature dovetail joints and mortise and tenon joinery at 1/12 scale. Techniques, tools, and practice exercises for small scale woodworking.
There is a moment in every miniature woodworking journey when you look at a butt-jointed piece and think: I want real joinery. Not glued surfaces meeting at right angles, but actual mechanical connections, the kind that would hold even without adhesive. That ambition is what separates miniature furniture from miniature models, and it is one of the most rewarding skills you can develop at the bench.
Cutting dovetails and mortise and tenon joints at 1/12 scale is demanding work. The tolerances are extreme, the parts are tiny, and the margin for error is measured in fractions of an inch. But with the right tools, the right technique, and a willingness to practice, it is absolutely achievable. I cut miniature joints on nearly every piece that leaves my workshop, and in this post I will share the methods that work for me.
Why Bother With Real Joinery at Miniature Scale?
Before we get into technique, it is worth addressing this question honestly. Glue alone is strong enough to hold most miniature furniture together. A well-glued butt joint on a piece this small will never fail under normal handling. So why go through the trouble of cutting real joints?
Authenticity
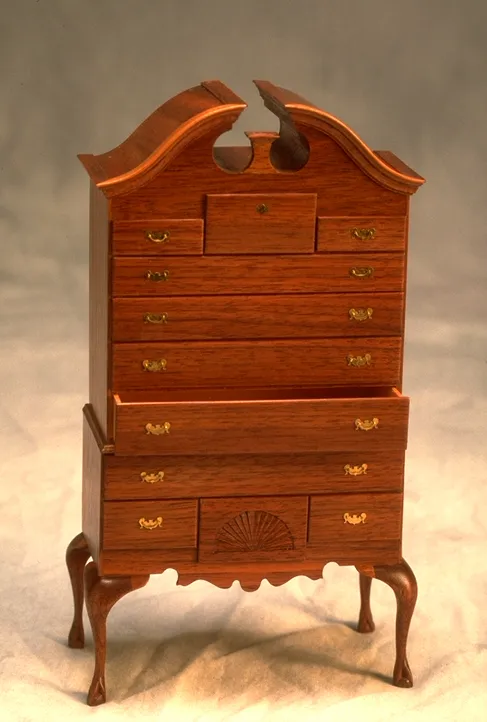
The originals had real joinery. If your goal is to faithfully reproduce a Chippendale chest, a Shaker table, or a Queen Anne chair, the joints are part of the design. A visible dovetail on a drawer corner is not just structural. It is decorative and historical.
Strength in Practice
While glue alone holds well under normal conditions, real joinery provides mechanical resistance to forces that stress glue bonds. A mortise and tenon joint resists racking forces. A dovetail resists pulling forces. For pieces that will be handled frequently, demonstrated at shows, or shipped to collectors, this added strength has practical value.
Personal Satisfaction
There is simply no substitute for the feeling of dry-fitting a hand-cut miniature dovetail and watching the joint close perfectly. It is a deeply satisfying test of skill, patience, and precision.
Miniature Dovetail Joints
The dovetail is the signature joint of fine cabinetmaking. At miniature scale, it becomes a signature of mastery.
Understanding the Geometry
A dovetail joint consists of trapezoidal pins on one board that interlock with corresponding tails on the mating board. The angled faces of the pins and tails create mechanical resistance to pulling apart. Standard dovetail angles range from 1:6 for softwoods to 1:8 for hardwoods. At miniature scale, I typically use a ratio closer to 1:7, which provides good mechanical advantage while keeping the angles visible to the eye.
Proportional Adjustments
As I discuss in my post on scaling down furniture plans, you cannot simply divide full-size dovetail dimensions by twelve and expect good results. A full-size drawer with seven dovetails might have pins that are 3/16 inch wide at 1/12 scale, which is cutting on the edge of what is mechanically feasible. I generally reduce the number of dovetails and slightly increase the pin width to maintain structural integrity and visual clarity.
A miniature drawer might have three dovetails where the full-size version had six. Each dovetail is proportionally a bit larger than mathematical scaling would dictate, but the overall impression reads as a properly dovetailed drawer.
Tools for Miniature Dovetails
You will need specific tools for this work.
- Micro chisel set: Flat chisels from 1/32 to 5/32 inch wide for chopping and paring
- Fine-tooth razor saw: For the initial cuts along the pin and tail lines
- Jeweler’s saw: For removing waste between pins and tails
- Marking gauge: Set to the thickness of the mating board for scribing baselines
- Magnification: A magnifying headband at 2.5x to 3.5x magnification is essential. You cannot cut joints you cannot see clearly
- Sharp pencil or marking knife: For transferring pin positions to the tail board
Step-by-Step Process
Marking Out
Begin by setting your marking gauge to the exact thickness of the mating board. Scribe a baseline on the end grain face of both the pin board and the tail board. This baseline is where the bottoms of the pins and tails will sit.
On the pin board, mark the pin locations. At miniature scale, I find it helpful to use a template cut from thin brass sheet. A template ensures consistent spacing and angle across multiple joints and multiple drawers.
Cutting the Pins
Secure the pin board vertically in a small vise with the end grain facing up. Using your razor saw, cut along each pin line down to the scribed baseline. Keep the saw on the waste side of the line. At this scale, half a saw kerf of error is significant.
Remove the waste between pins using a jeweler’s saw or by careful chisel work. Pare to the baseline with a sharp micro chisel, working from both faces toward the center to prevent blowout.
**Transferring to the Tail Board
Place the pin board on top of the tail board, align precisely, and transfer the pin positions using a sharp pencil or knife. This is where magnification becomes critical. Any inaccuracy in the transfer creates a gap in the finished joint.
Cutting the Tails
Cut along the transferred lines with your razor saw, again staying on the waste side. Remove the waste and pare to the baseline. The tails should be slightly tight. You want to have to apply gentle pressure to fit the joint together.
Dry Fit and Adjustment
Assemble the joint without glue and inspect. The joint should close fully with light hand pressure or gentle tapping with a small hammer. If it is too tight, identify where the binding is occurring and pare a tiny amount from the offending surface. If it is too loose, the joint needs to be recut. At this scale, there is no good way to tighten a loose dovetail.
Practice Exercise
Before attempting dovetails on a real project, cut a series of practice joints in scrap cherry or maple. Start with two dovetails on pieces about 1/2 inch wide and 1/8 inch thick. Cut ten practice joints before evaluating your work. You will see dramatic improvement between your first and tenth attempt.
Mortise and Tenon Joints
The mortise and tenon is the backbone of furniture frame construction. Table aprons join to legs with mortise and tenon joints. Chair stretchers, bed rails, door frames, and countless other connections rely on this fundamental joint.
The Basics at Miniature Scale
A tenon is a tongue of wood on the end of one component that fits into a corresponding rectangular hole, the mortise, in the mating component. The mechanical interlock resists both pulling and racking forces.
At 1/12 scale, a typical mortise and tenon joint involves a tenon that might be 5/64 to 5/32 inch long, 1/32 to 1/8 inch wide, and 1/32 to 5/64 inch thick. These are extraordinarily small dimensions that demand steady hands and sharp tools.
Cutting Miniature Mortises
There are two approaches to cutting mortises at this scale, and I use both depending on the situation.
Drilling and Chiseling
For mortises wider than about 1/16 inch, I drill a series of closely spaced holes using a pin vise and micro drill bits, then clean up the sides and ends with a flat micro chisel. The drill removes most of the waste, and the chisel squares everything up. This is the safer method for beginners because the drill establishes the depth and prevents the chisel from splitting the wood.
Chisel Only
For very small mortises or when the material around the mortise is too delicate for drilling, I chop the mortise entirely with a micro chisel. This requires extreme control and a very sharp edge. Work from both ends toward the center, taking tiny shavings with each chisel strike.
Cutting Miniature Tenons
Tenons at this scale are cut using a razor saw and cleaned up with a micro chisel. The key measurements are tenon thickness (which must match the mortise width) and tenon length (which must match the mortise depth). A tenon that is even 1/64 inch too long will prevent the joint from closing fully. A tenon that is a fraction too thick will split the mortise.
I always cut tenons slightly fat and then pare them to a precise fit using a sharp chisel. Removing wood is easy. Adding it back is impossible.
Shoulder Lines
The shoulder of a tenon, where it meets the face of the mortised piece, is the visible line of the joint. A clean, tight shoulder line is what makes the joint look professional. Scribe the shoulder line with a marking knife rather than a pencil. The knife creates a tiny groove that your saw can register in, producing a crisp, straight shoulder.
Pegged Mortise and Tenon
On full-size period furniture, mortise and tenon joints are often secured with a wooden peg driven through both the mortise cheek and the tenon. At 1/12 scale, this peg might be 1/64 to 1/32 inch in diameter. Drilling the hole and inserting the peg requires a steady hand and good magnification, but the visual effect is worth the effort on pieces where the peg would be visible on the original.
I make my miniature pegs from bamboo slivers or fine wire-diameter hardwood dowels. A drop of glue and a light tap with a pin set the peg, which is then trimmed flush with a sharp chisel.
Other Joints at Miniature Scale
While dovetails and mortise and tenon joints are the most prestigious, other joints have important roles in miniature furniture construction.
Tongue and Groove
Used for tabletop glue-ups and panel construction, a miniature tongue and groove can be cut with a razor saw and chisel. The groove is typically about 1/32 inch wide, cut into the edge of one board. The mating board has a corresponding tongue formed by rabbeting both faces.
Half-Lap Joints
Where two crossing members need to join at the same level, a half-lap removes half the thickness from each piece. At miniature scale, this means removing material that might only be 1/32 inch thick. A razor saw and chisel handle this efficiently.
Bridle Joints
A bridle joint is essentially an open mortise and tenon, where the mortise is open at the top. This is useful for certain leg-to-rail connections and is somewhat easier to cut than a closed mortise because you can see what you are doing throughout the process.
Building Confidence Through Practice
Miniature joinery is a skill that improves dramatically with dedicated practice. I recommend setting aside time specifically for joint cutting, separate from project work. Cut joints in scrap wood with no pressure to produce a finished piece. Focus on process, examine your results under magnification, and identify where you can improve.
If you are new to miniature woodworking, work through the fundamentals in my beginner’s guide before tackling joinery. A solid foundation in basic cutting, measuring, and tool handling will make the transition to joint work much smoother.
For the tools you will need, consult my essential tools guide. And when your joints are cut and assembled, proper finishing techniques will showcase the craftsmanship you have invested.
Visit my gallery to see how these joints come together in finished pieces, and reach out through my contact page if you have questions about specific joint techniques.