Building a Miniature Four-Poster Bed: Step by Step
Learn how to build a miniature four-poster bed at 1/12 scale. Expert guide covers post turning, headboard carving, joinery, and period-accurate fabric draping.
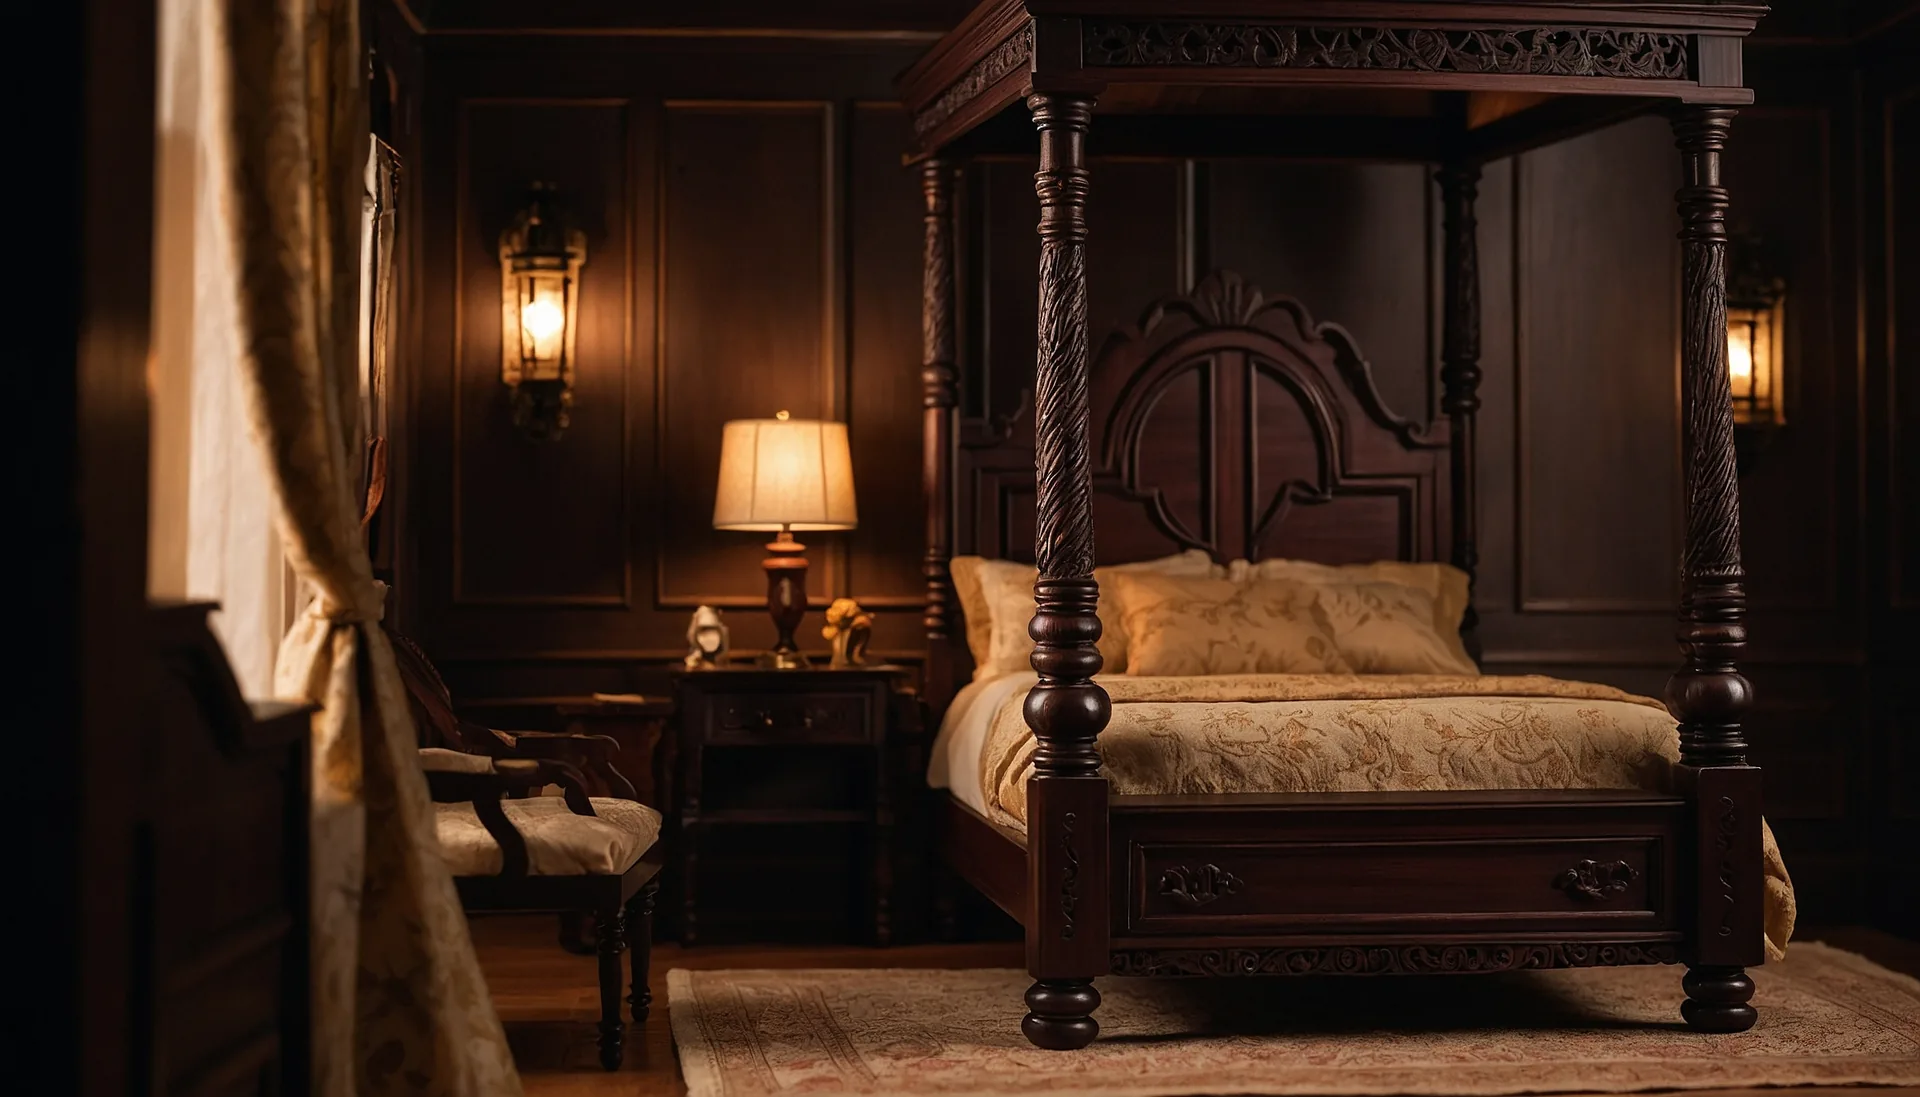
A four-poster bed is one of the most recognizable and dramatic pieces of furniture in any period room. At full scale, these beds commanded attention through sheer size and the richness of their carved posts, draped canopies, and layered textiles. At 1/12 scale, a well-made four-poster bed achieves the same presence in a dollhouse bedroom. It becomes the centerpiece around which every other element revolves.
Building a miniature four-poster bed draws on a satisfying range of skills: lathe turning, carving, precise joinery, and even textile work. In this article, I will walk through the major steps and share the techniques I rely on to produce beds that capture the spirit of their full-scale originals.
Choosing a Style and Period
Before cutting any wood, you need to decide what kind of four-poster bed you are building. The form spans centuries and styles, and the design differences are significant.
An early eighteenth-century Queen Anne bed features slender, gracefully turned posts with minimal carving. A Chippendale bed introduces fluted or reeded posts, often with carved acanthus leaves on the foot posts and a shaped headboard. A Federal period bed might have elegantly tapered posts with delicate reeding and inlaid headboard panels. And a Victorian bed could include heavy turned posts, applied ornament, and a tall upholstered headboard.
Each style dictates different turning profiles, different carving demands, and different proportions. I always start by finding reference images or measured drawings of a specific full-scale bed, then scale those dimensions to 1/12.
Post Turning on the Miniature Lathe
The four posts are the defining elements of the bed, and they are made on the lathe. This is where a miniature lathe becomes essential. I use a small hobby lathe equipped with a fine tool rest and sharp high-speed steel turning tools.
Preparing the Blanks
Each post starts as a squared blank of hardwood, typically around 3/16 to 1/4 inch square and approximately 4 to 4-3/4 inches long for a full-height poster. I use cherry, maple, or boxwood depending on the style. The blanks must be straight-grained and free of defects. Even a tiny knot or area of wild grain can cause a post to break during turning at this scale.
I mount the blank between centers on the lathe. Because the blanks are so small, I use a small drive center with a single spur rather than a four-spur drive, which would split the wood at this size.
Turning the Profile
I rough the blank to round first, using a small skew chisel. Then I lay out the major elements of the turning profile using a pencil and a ruler. The key areas are the foot (if the post terminates in a turned foot rather than a leg), the main shaft, any vase or urn shapes in the upper portion, and the finial at the top.
I work from the reference drawing, transferring dimensions carefully. At 1/12 scale, the difference between an elegant post and a clumsy one can be less than 1/64 inch. I turn each element with small gouges and a skew chisel, checking the diameter frequently with a dial caliper.
The most critical skill here is consistency. All four posts must match. I turn them in sequence, completing one section on all four posts before moving to the next. This approach makes it easier to maintain consistent diameters and proportions across the set.
Carving After Turning
For Chippendale and later beds, the foot posts often feature carved details like fluting, reeding, or acanthus leaves. These are carved after the post is removed from the lathe. I hold the post in a small vise padded with leather and use micro gouges and a sharp knife to add the carved elements.
Fluting, which consists of parallel concave channels running vertically up the post, is one of the most common post decorations. At miniature scale, I cut flutes with a tiny veiner gouge, using a simple indexing jig to space them evenly around the circumference. This is slow, careful work that requires a very sharp tool and a light touch.
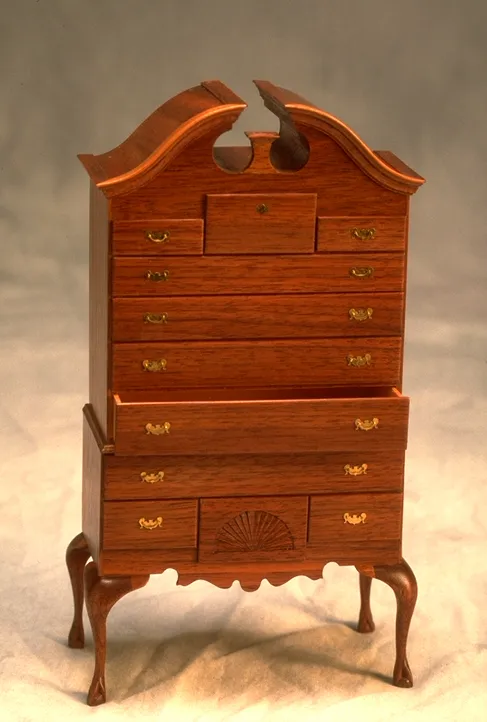
Headboard Construction
The headboard connects the two head posts and provides the visual backdrop for the bed. Depending on the period, this can range from a simple flat panel to an elaborately shaped and carved element.
For a Chippendale bed, I typically shape the headboard from a single piece of thin stock, about 1/16 to 5/64 inch thick, cut to a scrolled profile with a jeweler’s saw. The top edge might feature a serpentine curve or a central pediment shape. If carving is appropriate to the style, I add it with micro gouges.
For a Federal period bed, the headboard might be a framed panel with an arched top and perhaps an inlaid oval or fan motif. Inlay work at this scale is extremely challenging but deeply rewarding. I use thin veneers of contrasting woods, cut to shape and set into shallow recesses carved into the headboard surface. I cover inlay and stringing techniques more thoroughly in my article on Federal period miniature furniture.
A simple headboard for an earlier period bed might be nothing more than a flat board with a gently curved top edge, joined between the posts. This is a good starting point if you are building your first miniature bed.
Rail Joinery
The side rails and end rails connect the four posts into a rigid frame. At full scale, beds traditionally use a bolt-and-bracket system that allows disassembly. At 1/12 scale, this level of engineering is impractical, and I use fixed joinery instead.
I join the rails to the posts with small mortise-and-tenon joints. The tenons are cut on the ends of the rails, typically about 5/64 inch long, and the mortises are drilled and chiseled into the inner faces of the posts at the appropriate heights. The headboard connects to the head posts in the same manner.
Squareness is critical during assembly. I dry-fit all the joints first, checking that the frame sits flat and that the posts stand vertical. Then I glue up in stages, joining one end first, then connecting the side rails and the opposite end. I use slow-setting glue to give myself time to make adjustments.
The footboard, if present, joins the foot posts at a lower height than the headboard. Many period beds have no footboard at all, or just a low rail. This is actually helpful for the miniaturist because it leaves the foot posts fully visible, showcasing their turned and carved profiles.
The Canopy Frame
The canopy, also called a tester, is the rectangular frame that sits atop the four posts. At full scale, it supports fabric hangings and sometimes a fabric ceiling. At 1/12 scale, it provides the structure for the bed curtains and valances that give a four-poster bed its visual drama.
I build the canopy frame from thin strips of hardwood, roughly 5/64 by 1/8 inch in cross section, joined at the corners with half-lap joints. The frame sits on top of the posts and is either glued in place or held by small pins that allow it to be removed for textile work.
For some styles, the canopy frame features a shaped cornice or a carved and gilded valance board. These are built separately and attached to the frame. A serpentine cornice, common on Chippendale beds, is cut from thin stock and shaped with files and sandpaper.
Fabric Selection and Draping
The textiles on a four-poster bed transform it from a wooden frame into a complete piece of furniture. Choosing the right fabrics and working them at 1/12 scale is an art in itself.
Selecting Fabric
The most important consideration is scale. Full-scale fabrics with large patterns look completely wrong on a miniature bed. I use fabrics with very fine patterns or solid colors. Silk is excellent because it drapes naturally at small scale and has a period-appropriate sheen. Fine cotton batiste works well for bed linens. For heavier curtains and valances, I look for lightweight fabrics that suggest damask, brocade, or chintz without obvious pattern scaling issues.
Making the Bed Hangings
Period four-poster beds had curtains on all four sides that could be drawn closed for warmth and privacy. At 1/12 scale, I typically make curtains for the head and foot, and sometimes for the sides, using hemmed rectangles of fabric gathered at the top and attached to the canopy frame with tiny hooks or stitching.
Valances, the shaped fabric panels that hide the top edge of the curtains, are cut to a scalloped or serpentine profile and stiffened with a thin card backing. I attach them to the outside of the canopy frame with fabric glue.
The bedding itself consists of a mattress, which I make from a block of foam wrapped in fabric, plus sheets, blankets, and a coverlet or quilt. Each layer is cut to scale and finished with tiny hems. A well-dressed miniature bed has the same layered richness as its full-scale counterpart.
Bringing It All Together
A completed miniature four-poster bed is a piece that draws the eye immediately. The turned posts, the carved details, the carefully chosen textiles, and the overall proportions all work together to create something that feels genuinely grand despite being small enough to hold in your hand.
If you are considering building one, I suggest starting with a simpler style, perhaps a Queen Anne bed with plain turned posts and pad feet, before attempting a fully carved Chippendale example. The fundamental construction is the same, and the experience you gain with joinery, turning, and textile work will serve you well when you take on more elaborate designs.
You can see examples of beds and other miniature furniture in my gallery. If you have questions or are interested in commissioning a specific bed design, please visit my contact page. I am always happy to discuss the craft with fellow enthusiasts and collectors.